SURVIVING SCHOOL HOLIDAYS 101

Wow!! i cannot Believe that the school holidays are starting in 2 days, for some moms this is something to look forward to, for some moms it is daunting, because we all know keeping our kids busy in the winter comes with a whole lot of challenges not to mention headache tablets and hairgrowth treatments!i know i am one of those moms who by the end of the holiday have almost no hair left and the ones that has'nt been pulled out are in need of colouring because they were left completely grey!!
So to keep the kids happy and the mommy's sane i have decided to for the next 4 or 5 days post ideas for things to keep the little one's busy!
Today i will start of with a few basic diy recipes for a few things that we can use and later on today i will start posting photos and ideas of what crafty things you could do this holiday!
Fingerpaint
1/2 cup cornstarch
3 Tbsp. sugar
1/2 tsp. salt
2 cups cold water
food coloring
Instructions
In a medium pan, mix all the ingredients together to make the finger paint. Cook over low heat 10 to 15 minutes. Keep stirring the finger paint mixture until it is smooth and thick. After the finger paint has thickened take the pan off the stove and let the mixture cool.
After cooling, divide the finger paint into storage containers depending on how many colors you would like. Add a few drops of food coloring to each container. Stir the coloring in to the paint to determine the shade of color. You're ready to finger paint! Cover tightly when storing.
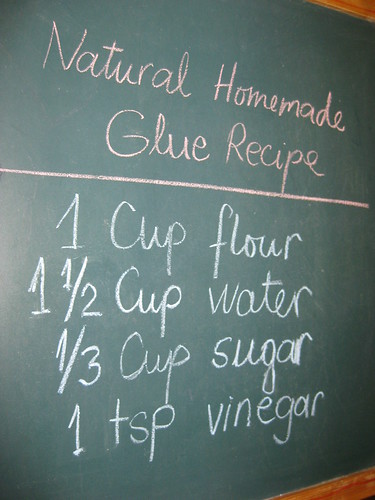
Now For some Glue!!

In a saucepan mix 1 cup of flour with 1/3 cup of sugar.
Add half of the water required and mix into a thick paste without clumps.
Pour in the rest of the water and combine till the paste is smooth.
Pour a teaspoon of vinegar and put on medium heat until the mixture starts to thicken.
Cool and transfer to jar or an airtight plastic container.
This glue will keep for a few days. Refrigerate to prolong the shelf life (the jar in my fridge is 6 months old).
Vinegar in this glue recipe acts as a mild natural preservative. You might use grapefruit seed extract or tee tree oil (5-10 drops) instead of vinegar to naturally preserve the glue. Stick with vinegar though if you have small kids – not only is this glue non toxic, but perfectly edible too!
This glue needs more time to dry, but when dried, the bond is really strong.
PLAY DOUGH

Ingredients
2 cups flour
2 cups warm water
1 cup salt
2 Tablespoons oil
1 Tablespoon cream of tartar
food coloring
Mix all of the ingredients together, and stir over low heat. The dough will begin to thicken until it resembles mashed potatoes.
When the dough pulls away from the sides and clumps in the center, remove the pan from heat and allow the dough to cool enough to handle.
IMPORTANT NOTE: if your playdough is still sticky, you simply need to cook it longer!
Keep stirring and cooking until the dough is dry and feels like playdough.
Turn the dough out onto a clean counter or silicone mat, and knead vigorously until it becomes silky-smooth. Divide the dough into balls for coloring.
Make a divot in the center of the ball, and drop some food coloring1 in. Fold the dough over, working the food color through the body of the playdough, trying to keep the colouring away from your hands You could use gloves or plastic wrap at this stage to keep your hands clean- only the concentrated colouring will color your skin, so as soon as it's worked in bare hands are fine.
Work the colouring through, adding more as necessary to achieve your chosen color.
Play with your playdough- I really don't need to help you there. It's entirely edible, if a bit salty, so it's kid-safe.
When you're done, store your playdough in an air-tight container.
- If it begins to dry out, you can knead a bit of water in again to soften the dough back to useability. Once it's dried past a certain point, however, you'll just have to start over; thankfully it's not terribly difficult.
- If it gets soggy, you can re-heat it to drive off the extra water the dough absorbed overnight. This is usually the result of high humidity, but is fixable!
You can also bake it in the oven to make hard dough figures and ornaments, then paint or otherwise decorate the surface.
Till next time
xx