Wednesday, 27 June 2012

HOLIDAY CRAFTS PART 3 - PLASTER OF PARIS!


Plaster of Paris Hearts


These crafts are super easy and super fun!

when mixing the plaster of paris for the hearts you use 2 cups of plaster of paris and 1 cup of cold water, start mixing you will see that the mixture starts of as watery and then starts to become thicker, once all the lumps are out, pour it into the silicone baking mould , leave it for about 5minutes to set alittle, then at the top place a skewer stick or someting like a pencil and let it stand for about 30 minutes or until it is dry. Carefully remove the pencil or skewer that you inserted in to the mould. Then turn the mould around and simply twist off the silicone mould! tada! paint it, the paint a coat of deco varnish or decoupage on it to seal it , rope through some ribbon and you are done!
These hearts are awesom to hang in your garden,in your childs room, or if you have an art wall in your house like i do you can add the new collection on there!

Variations:

You can place your child's hand in the plaster of paris mould, when it is staring to set, once it is dry, you have an awesome print of your childs hand in the heart mould, paint, seal and store in your memory box!


Your child can also do "mosaic"
You simply wait until the plaster of paris has set to a state where it is not runny anymore, but is still a little mushy for the beads to stick to it, just paste the beading to a sticky part of the heart and leave to dry,once it's dry pop it out of the silicone mould and DONE!


ENJOY!!

xx


Tuesday, 26 June 2012

School Holiday Crafts Part 2

Kids Crown


Foil-and-Paper Crowns

Crowns How-To

1. Tear off aluminum foil about 50 cm long. Fold in half twice, long sides together, or cuff; lay cuff with opening toward top.

Fold 50cm-wide tissue paper in half lengthwise twice; lay inside V of the cuff, folded edge up, so bottom edge is just below center of cuff.

2. Fold foil strip in half again, folding up from the bottom (this will hold the tissue in place).

3. Cut flat-topped points in tissue paper, leaving attached at the fold, and decorate with stickers.

4. Overlap ends to proper size, and slip one end of foil inside the other. Tape or glue together.


and TADA!!!

Use pinks and purples, and if you have any of these little stick on jewelery you can add those on there for your little princess!!

Want to get your little one's to start saving some money? Well let them make their own little money bank!!

Money Pig

Bottle Bank

This little piggy (bank) started off at the market as a 2ltr fair cape milk bottle. To make one, rinse an empty bottle with hot soapy water; let dry. Cut features such as eyes, ears, and nostrils from cardboard/scrapbook or normal painted or coloured in paper (ears should have tabs). Attach with double-sided tape, or glue as shown in the picture. Tape patterned paper around body.   empty bottle caps (coke,fanta etc) on for legs. Cut a slot at the top for coins, and a hole in back to insert a pipe-cleaner tail.

Tada!

Enjoy

xxx

Monday, 25 June 2012

School Holiday Crafts Part 1

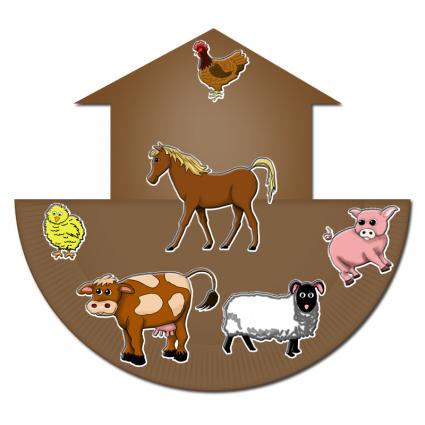
Build Noah's Ark


What You will need:
  • Paper plate
  • Two sheets of brown construction paper
  • Scissors
  • Glue
  • Cotton balls

Instructions

  1. Place the two pieces of construction paper in a stack
  2. Draw a house shape on the top sheet (rectangle for a body and a triangle for a roof).
  3. Cut out the house shape, making sure to cut through both pieces of construction paper simultaneously
  4. Glue cotton balls on the back of one sheet of the construction paper shapes to give it bulk
  5. Glue the two pieces of paper together at the edges. This will make the ark appear full.
  6. Fold the plate in half, creasing it tightly
  7. Cut a slit in the fold in the plate that is wide enough for the house to slip into
  8. Slide the house into the ark's base until only a small piece of the rectangular piece is visible above the plate
  9. Stuff more cotton balls into the plate
  10. Glue the plate shut along its curved edges
  11. Paint the plate brown to match the house shape and to complete the ark.